Starla Parkin

Live your life with intention!

  • Home
  • Blog
    • Simple Living
    • Gardening
    • Preservation and preparing food
  • About

Gardening

Bringing the Outside in

By starla on August 19, 2022

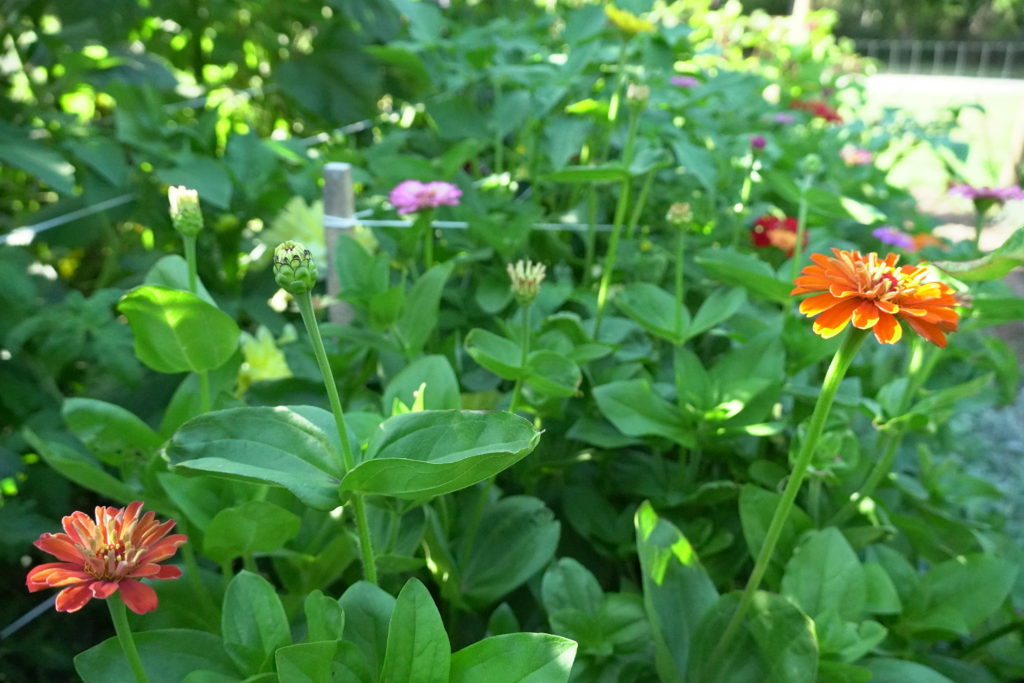
              There is nothing nicer than breathing in the fresh air of the morning breeze, feeling the warmth of the sun’s rays kissing your skin and strolling around the garden taking in every ounce of beauty from all around. It is the time of the year when the Dahlias, cosmos, sunflowers and much more are all in bloom. The time when the bees are buzzing around collecting pollen from every bloom they can. A time of beauty and abundance. A time that we all look forward to and patiently wait for. When our produce is readily available, and we are striving to just stay outdoors for a little bit longer.

We bring our daily tasks outdoors, take extended walks, outdoor picknicks and refreshing swims in any body of water that is around. Family and friends gather to enjoy laughter, make memories and long for the days to never end.

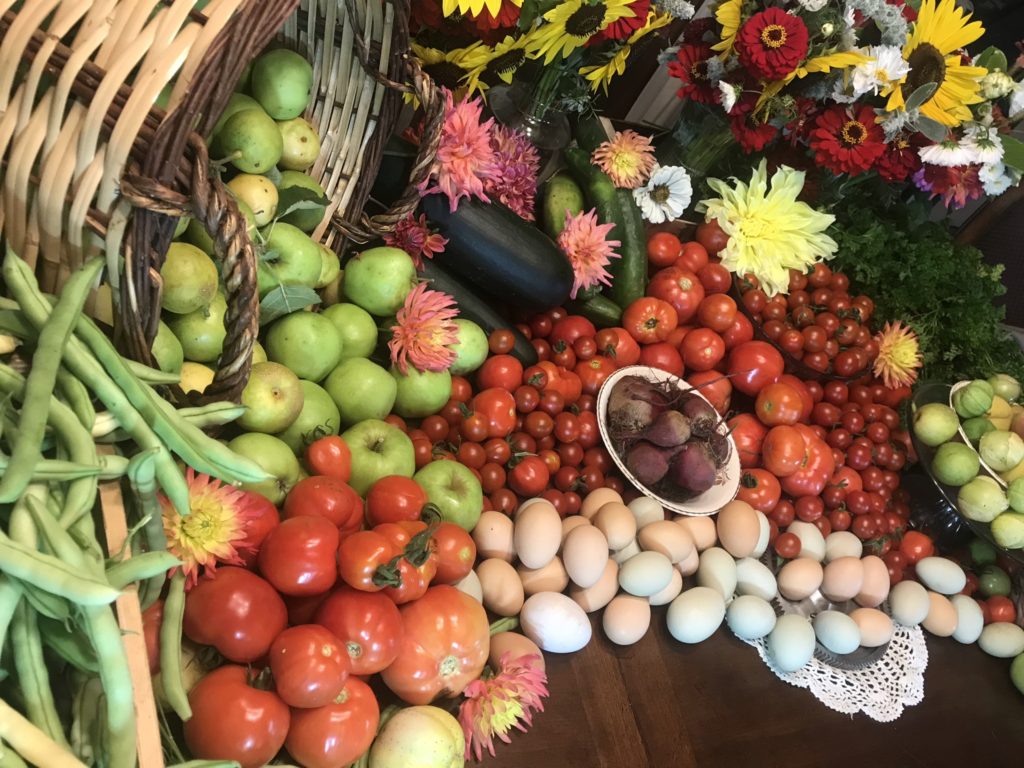
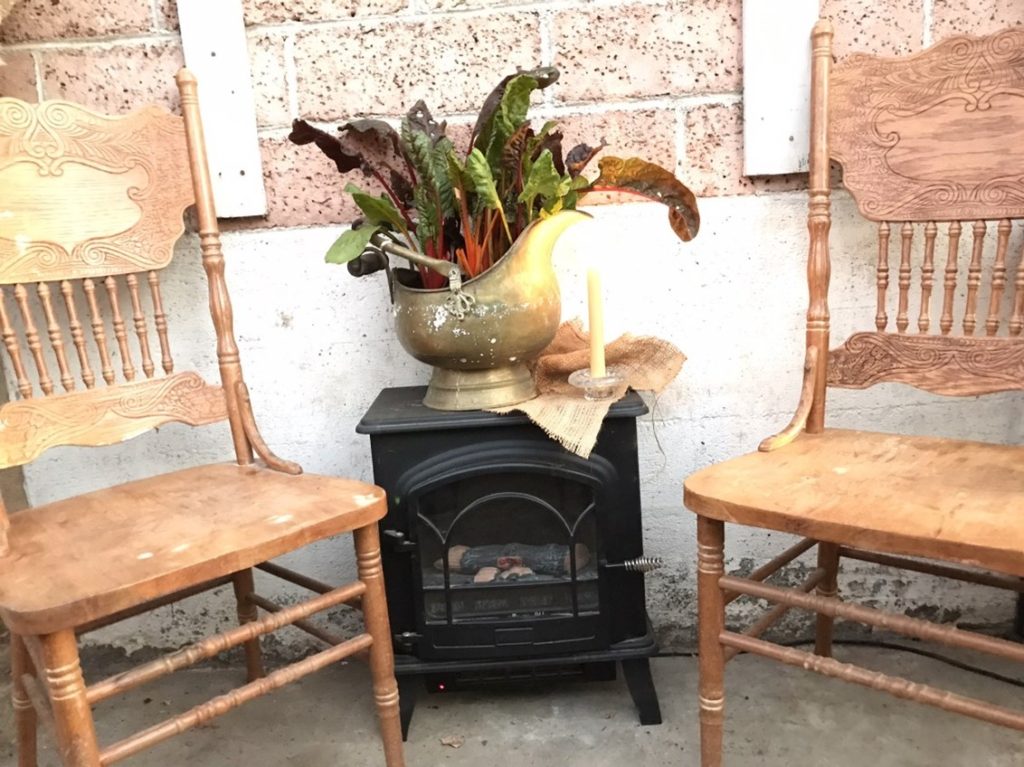
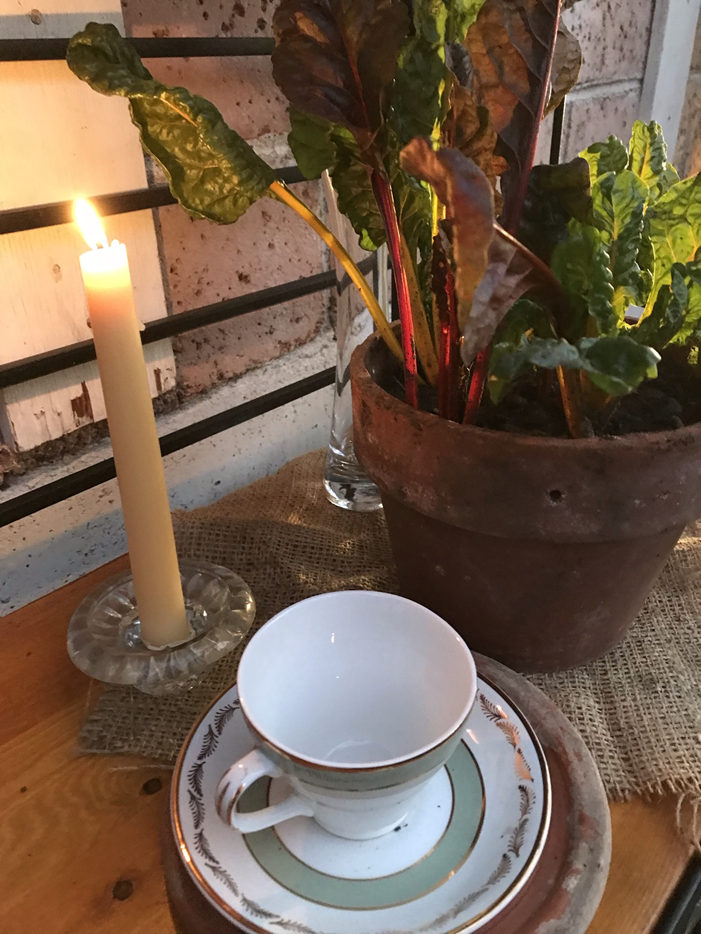
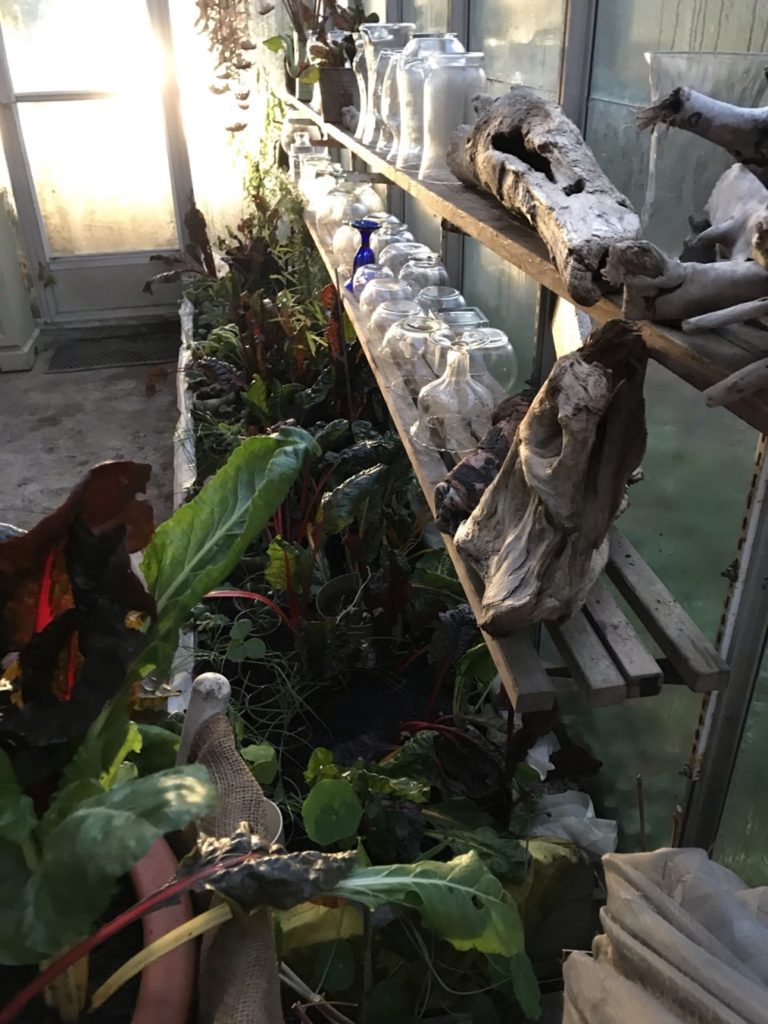
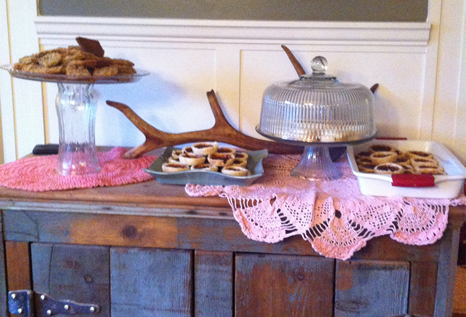
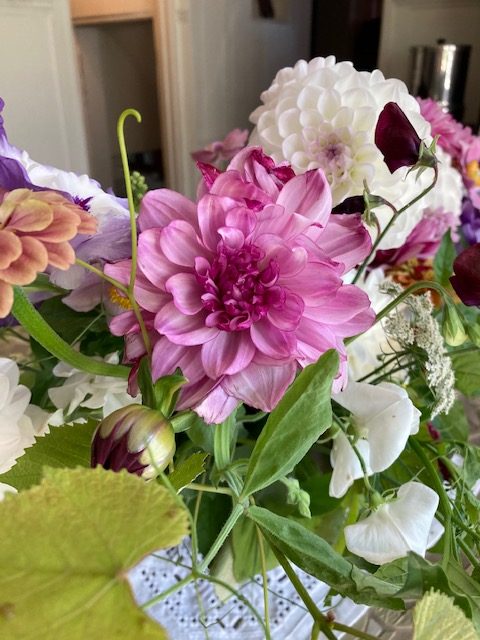
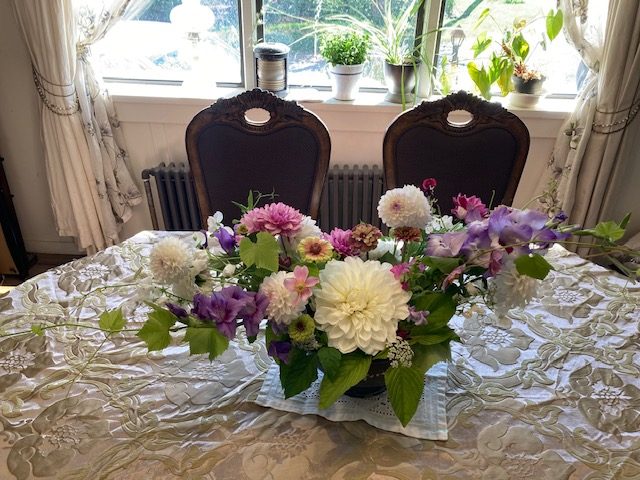
When it is time to return to the indoors completing the tasks that just don’t go away on their own there is something that I just can not help myself from doing, that is bringing the outside in to extend summers beauty wherever I may be. Feeling the visual beauty along with the lovely fragrance the flowers produce is always welcome in every room.

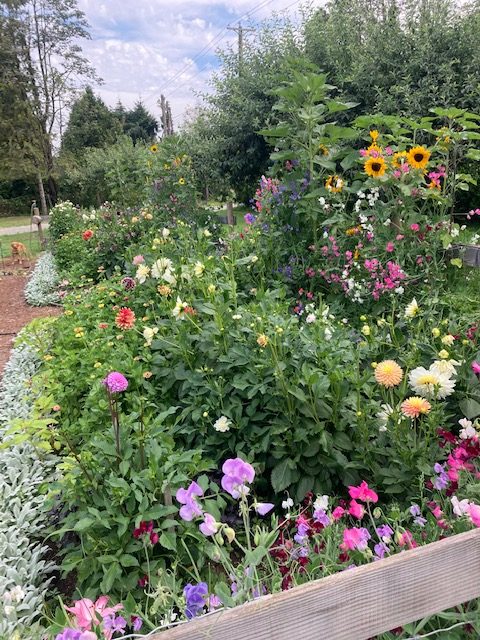
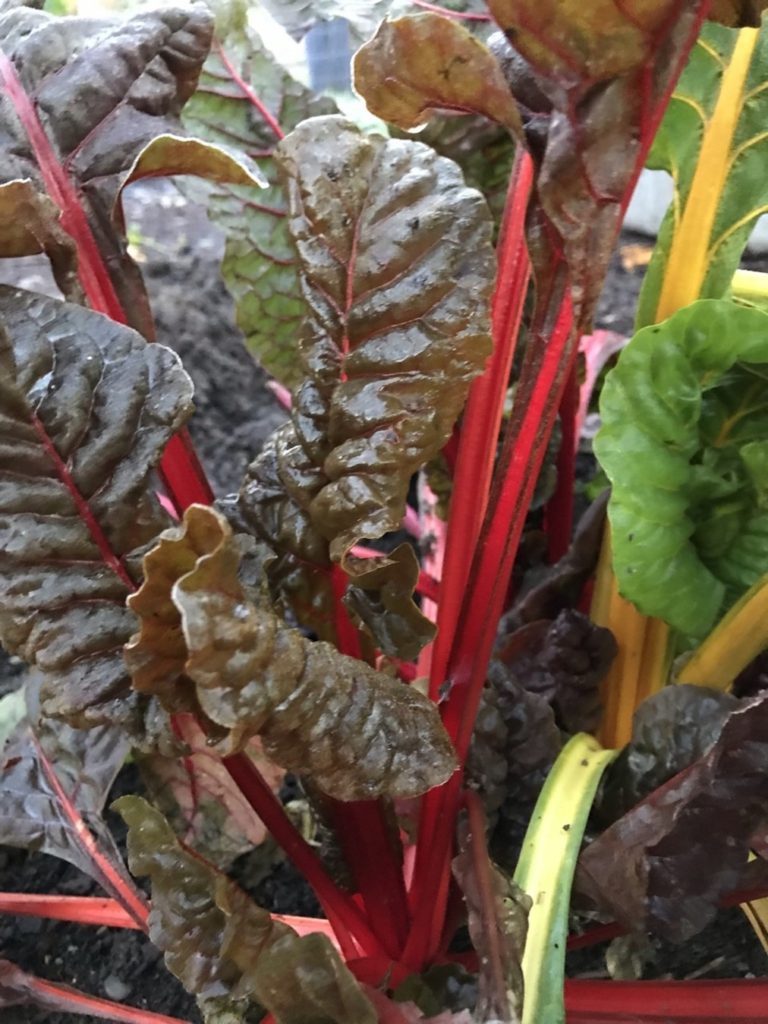
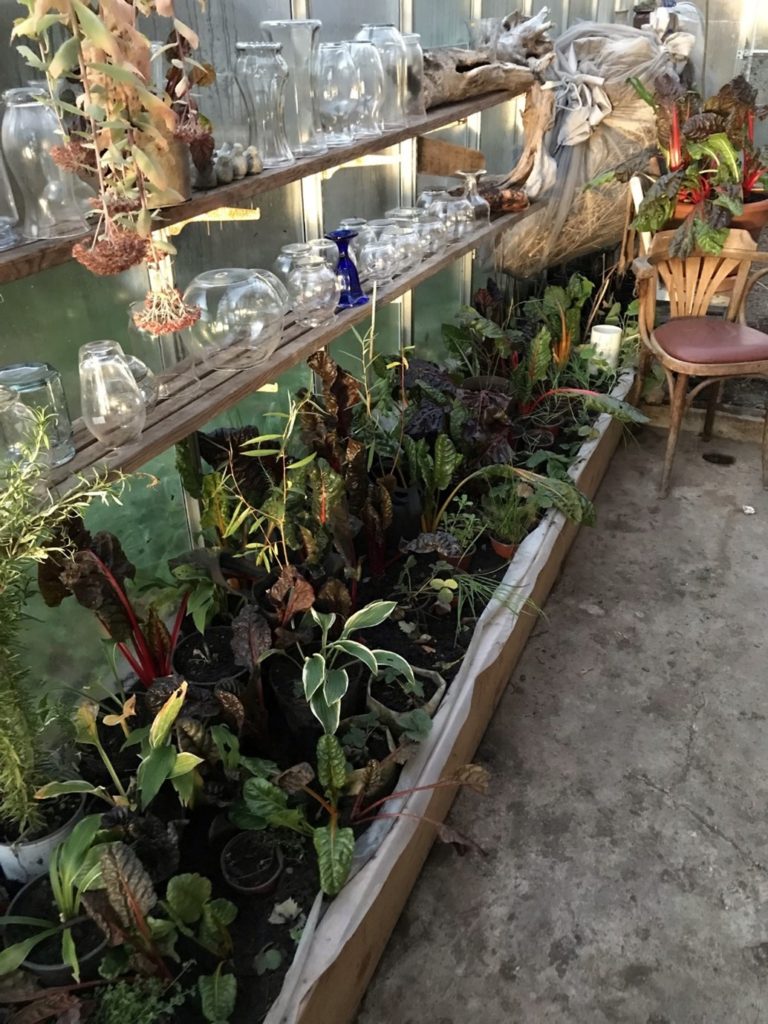
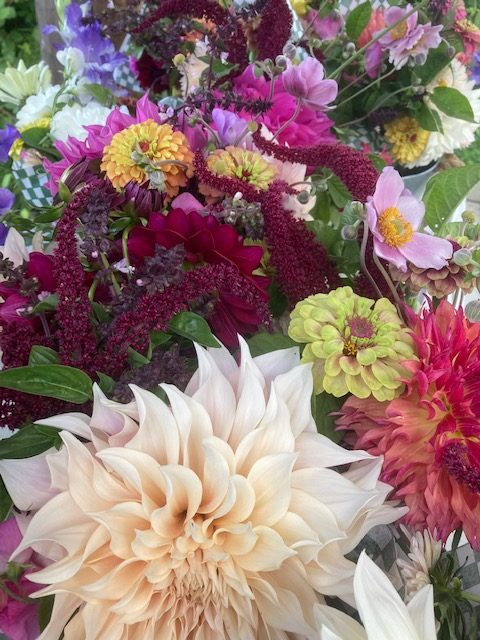
When strolling the garden in search of the perfect stem to include in the bouquets there is a few things that I look for. I want to make the bouquet do more than just look beautiful on the table or ledge. I want that bouquet to create a feeling in the room, to set the mood, you could say. How you might ask, by the form, colors and the smell. I think of what room I am harvesting for, the size that I want to achieve and most importantly the feeling that I want to release.

Do I want it to be natural, Flowey and springy? I would choose longer steams of cosmos, grape and lavender. Or maybe I want it to speak of a hardy appearance, a bit more traditional, then I would choose Dahlias, basil, and feverfew. For something sweet and mystical, cosmos, sweet pees and amaranthus might be the right choice.

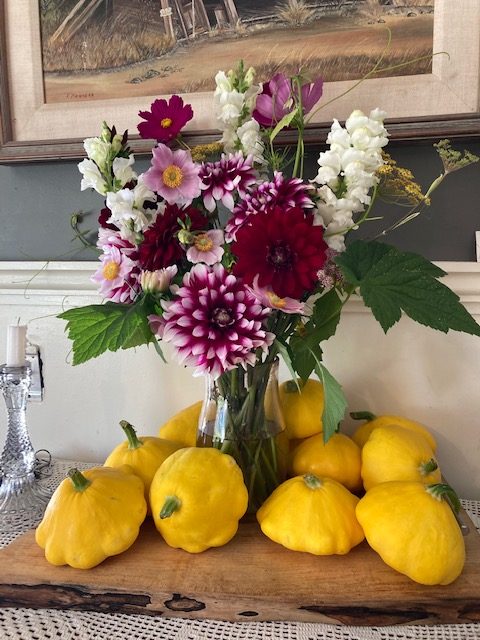
Harvesting to the end feeling both sensationally and visually, I can add that special element to each room. It adds a conversational piece, enjoyment, and the special touch only this time of the year can bring. One of the best things about adding the outdoors to the inside living space is how it changes with every month. It makes us look at our gardens differently and creates something to look forward to as you are waiting for the bloom to open and expose its true beauty. Most of all it gives us the ultimate gift to share with family and friends.

Enjoy mixing and matching with different blooms and foliage, enjoy what nature gives us both indoors and out.

Growing your garden from seed -18 seedy secrets

By starla on May 3, 2022

One of the most exciting things in the garden is to sow a tiny little seed into the soil and watch it as it comes to life. With each day new growth appears until one day it happens, the bud of the flowers starts to bloom revealing the hidden treasure of the flower blossom! It is rewarding to grow vegetables from seed as well, resulting in a fresh plate of home grown food.

Zinnia sowed directly into prepared soil 6″ staggered spacing.

              I have spent many years growing flowers, herbs, and vegetables from seed, and I have learnt a lot from doing so. Some of the greatest lessons that I learnt is from just getting started and have helped me grow into a greater gardener. This allowed me to be able to grow a larger variety of plants from seed to plant throughout our property.

Here are 18 Seedy secrets that I have learned:

  1. Start from the ground up – if you do not have the proper soil you will not have the desired growing success, soil is one of the most important things in gardening.
  2. Let the light in – believe it or not some seeds need light to germinate. Meaning you place the seed on top of the soil and bottom water, you can put a small about of vermiculite on top to keep the seed in place until the roots start to grow.
  3. Pot it up – When starting some plants in the greenhouse they can get root bound in the smaller tray containers of 72, potting up the plants into a larger container will allow the plant to stretch its roots and grow. Plants need room to grow, by giving them the room it can make a difference from a tired discolored plant and a bright green healthy one.
  4. The importance of light – by having the seedlings under a grow light that is kept about 1” above the tops will grow you a stronger and healthier plant, until they are established enough to be potted up or planted out.
  5. Importance of cell trays – cell trays come in a variety of sizes you can buy 72 cell, 60 cell, 200 cell. Each tray has a different cell size for the tray, the purpose is to be able to grow a large about of plants in a smaller area. Once the plant grows enough in the cell tray they can be potted up or transferred directly into the garden.
  6. Hardening off – I am not always good at this but hardening off your plants before transferring them into the garden gives them a better chance and the plant a stronger start by not shocking the plant. To harden off your plants you would expose the plant to the outdoors a little bit at a time, slowly increasing the time per day until you plant them into the garden, about 3-5 days.
  7. Bottom watering – Water is key to keeping your seedlings from drying out in their tiny pots. By using a tray and putting the pots into the tray you can put 1/4” of water into the bottom of the tray and allow the plant to wick up the water. This also helps the tender plant from getting knocked down from overhead watering.
  8. Let the fan blow – keeping a fan gently blowing on the plants will give the plants constant wind movement and encourage them to grow a stronger steam.
  9. Bottom heat – to get the seeds to germinate faster allowing bottom heat to the sowed trays work great. I put a towel on top of our radiator, then the seed tray on-top of the towel or use a heat mat. Throughout the sowing season I sow a few trays each day or two to be able to have the room on bottom heat.
  10. Cold treatment – Some seeds do better by having a cold treatment before sowing. This simulates their natural habitat and can be done by putting them in the fridge for 2-3 weeks before sowing.
  11. Timing – sowing the seeds at the right time is a gift to know. If you sow your plants to early they can become to root bound and struggle growing to their full potential. Starting the seeds to late in the season may not allow them enough growing time to mature before the last frost kills them off.
  12. Frost dates – knowing your first and last frost dates allow you to be able to know when to start your seeds and when you need to get things out of the garden. Count back from your last frost date and mark the weeks on the calendar with the number, now when your seed packet says 6-8 weeks from the last frost date you will know when to start the seeds. For sowing a fall and winter garden you will want to know your first frost date in the fall and count back to know when to sow the seeds to allow enough growth before the growth rate is slowed down through the winter months. Knowing the first frost date will also give you a deadline to get frost sensitive things out of the garden like gladiolus corms and dahlia tubers.
  13. Water it in – when you sow the seeds give them a generous watering to wake them up. When you plant out your new plants make sure to water them in once planted into the garden as well.
  14. Fertilize – yes you can fertilize seedlings. Most potting soil dose not have any nutrients in it, so fertilizing your seedlings will give them a stem up.
  15. Know your garden space – ok, this I need a lot more work on….. knowing the square foot of the garden you have and the space the plants you sow will need will give you a good idea of how many plants to start. I try to sow an additional 20% from what I need, that way I will have enough if a plant dies or is not a strong plant and will give me extras to give away.
  16. Garden Plan – This is gold! I have heard a lot of great things about having a garden plan, but it has only been the last few years that I have paid attention to this and felt the greatness of having the plan. You can keep this simple or have it a more detailed. I have a cheat sheet of spacing per square foot (4” spacing staggered = 7 plants per square foot). Doing this lets me know how many plants fit into each bed per square foot. The plan also tracks the growing history of the garden beds, keeping it easy to know what needs to be rotated to keep the soil nutrition balanced.
  17. Seed lifespan – seeds like all living things do not live for ever. Pay attention to the life span of the seeds and make sure to use the older seeds first to keep your seeds from going bad before you plant them.
  18. Space savor – to save space on the heat pad and under the grow lights I will sow multiple seeds into a smaller container (4” pot). When the first true leaves start to appear you gently separate the seeds into their own cell in a 72 or 60 cell tray. This ensures that each cell of the tray has a plant in it, saving room under the grow lights and allows a higher volume of seedlings to germinate at once on the heat pad. This can be a great way to test your germination without wasting the valuable greenhouse space.

I hope these seedy secretes help you have more growing success. I know it is great to have them written out to remind me of the areas to continue to grow in.

The Garden Plan

By starla on January 18, 2022

The snow has blanketed the ground and now is mostly melted, the signs of spring are emerging from the cool soil surfaces. It brings excitement and joy knowing the days are getting longer and life is coming back into all the plants that have been dormant for so long.

               These signs only remind us that just around the corner it will be time to set the seeds into the ground and plant the spring bulbs. It is time for the garden planning to begin. I like to take this time of the year to reflect on what worked last year and what didn’t, the new things I would like to try and the discoveries that need to be changed. If there is a new section of the land that I want to transform into a beautiful, planted landscape or a garden that needs to be returned to grass.

              When you have a garden plan it eliminates the guessing and allows you to create a beautiful atmosphere for you, the family, and friends to enjoy throughout every month of the year that follows. By taking the time to walk through the property at this time of the year allows you to see the bear truth of the land. The structures and trees are predominant which creates the base of the garden. From the base of the garden, you can create the internal structure the flowers and filler plants. Whether you are growing a vegetable garden or a flower garden you will always have a base to work off.

              As we walk through the yard, we create a list of goals of what we would like to achieve, what worked and what we would like to change and chat about time frames for these goals to be completed by. Kind of a garden wish list, some years we can achieve all the goals that we set for ourselves and some time the goals get rolled into the next year or changed as the year passes by. The best part of doing this is that there are the goals for us to target and work off. When the time comes around, we have direction and can plan to have the needed material on hand for the free time that we can work on the goals.

              Once we have the goals in place we can focus on the planting. We note what is there and what we would like to add or take away. If there is a perennial that is not working in a certain area of the yard, we can dig it up and move it to another portion of the yard or give it away. A garden is meant to bring joy to you when you spend time in it. If it is full of plants that you truly do not like or if it is not working in an area or maybe you just are ready to try something new, don’t feel guilt for digging up a plant to move it or change a garden around.

              Once you have your base add the filler plants in, whether that be annuals (live for one year) or perennial plants (comes back year after year) or even a mix of both. When thinking of the plant to put into the spot take note of the full height and width the plant will grow.  Think of the colors the plant will have in relation to the surrounding plants, the same goes with selecting the flowers. And lastly think of succession and companion planting, if you have a spot that the plant takes a few months to grow to full height, may be try planting a fast growing annual that you can enjoy until the other plant grows up then you can remove the annual and compost it while you enjoy the other plant.

              For vegetable gardening succession and companion planting is a great tool to have in your back pocket. Don’t worry to much about all of this it will take time to learn how fast plants grow, what they like for soil types and when to plant. The more you get your hands into gardening whether it be flowers, shrubs, or vegetables the more you will know and be able to experiment with what you grow.

              One way I keep everything organized is I draw out the garden layout, noting the size of the beds and paths. Note what permanent structures are in the area or note anything that I want to achieve. Then I put in the perennials, trees or shrubs that are in the area. Next, I note where the sun is or shade, this I do by lightly shading any spots of the garden that has shade throughout the day. This helps greatly when trying to pare up the area with the type of plants that can grow in the areas. Next, I print out a picture of the plants and lay out the plants that I want to grow by size they will grow and their needs, ie full sun, part sun/shade or full shade and any other major things that need to be considered. This way I can easily place the plant into the section of the garden that I want to fill and will get a visual of what it will look like when the garden is in full bloom.

              I note on the calendar when the last frost is, when the seeds need to be planted or when certain plants need to be planted into the garden. When I have an idea of what I want in the garden, I can be prepared for what that plant needs are or how the ground may need to be prepared before the plant gets planted. I can make sure there are garden structures in place before planting the tomatoes or dahlia instead of trying to put something into place when the plant is falling over and needing support. At this point I can space out the things needing to be done during the upcoming months and make them work with our family schedule. I find this works well, we become more prepared of the needs of the yard and can stay on top of everything easier instead of everything coming to head all at once.

              Over the years I have found that good planning makes the season more enjoyable and allows me to be able to find little spots in the garden that I can try out new plants or methods that I would normally not try. Every year I try out a new plant or growing method. The more I try new things the more I learn and grow as a sustainable gardener.

              The most important thing is to have fun with the process whether it be big or small enjoy each stage the garden brings. Happy growing friends!

Overwinter Swiss Chard

By starla on November 2, 2021

Swiss chard is by far one of the natural powerhouse vegetables of the garden. It is packed full of vitamin K, A and C, as well is packed full of magnesium, potassium, iron and dietary fibers. It is easy to grow from seed, transplants well and loves cooler weather. Which means you can grow it from early spring to late fall in the garden’s soil. Swiss chard is a low light loving plant and dose best grown in rich soil. Planting Swiss chard along other plants that are taller such as cabbage, peas or bush beans lightly shades the plant and helps to prevent the plant from bolting on the hot summer days.

Swiss Chard in the Garden, left to overwinter to be utilized as seed plants in the future.

              Through the winter months it is harder to grow fresh greens to add to the meals. That is why we like to transfer our Swiss chard from the garden’s soil into the greenhouse and into pots. If you don’t have a greenhouse, you can overwinter the chard in the garden soil if the temperature doesn’t drop below -9. Overwintering in the garden soil means it will be slower growing so you will not be able to maximize the harvestable yield from the plant. Typically, I will leave a few strong plants in the garden to act as my seed plants. Swiss chard is a biennial plant, needing two years to produce seed. 

Swiss Chard transferred into a pot. It can be brought into the house or left in the greenhouse.

              When daylight is getting shorter, and the fear of frost is right around the corner I dig up the Swiss chard and transplant into a wicking bed in the greenhouse and pots that I can move around. The Swiss chard dose better in the wicking bed then being planted directly into the ground in the greenhouse. When planting in pots I plant them close together as they do not need a large space and over time you are harvesting the leaves which keeps space between each plant. You can bring the potted Swiss chard into the house for the winter months, just make sure they are getting as much sunlight as possible or place under a grow light for 6 hours per day.

Swiss Chard transferred into the wicking bed in the greenhouse, in amongst other potted plants and herbs.

Using Swiss Chard:

The leaves are great eaten raw or cooked.

We like to chop up the leaves and add it to our winter salads. You can also add it to stir fry, grilled over the open fire, or even just serve steamed with butter and garlic with a dash of salt and pepper. As the stalks are a bit harder, when steaming it is best to cut the stalks out and steam them first before adding the green leaves.

The Home Environment

By starla on October 21, 2021

The smell, touch and energy surrounding you in your everyday living has a great effect on the way you feel, how you are inspired and what motivates you throughout the day. Everything you hear and see, the atmosphere that we create that is surrounding us in our day-to-day life, our home environment.

              As large or small the things around us, the way our things are presented and displayed have a certain about of energy that rings off them creating the energy that we wake up to, the energy that we come home from work to, and the energy that we fall asleep to at night. The home environment is all around us throughout the day, so we may as well use it to create inspiration and motivation. By changing even just a few things on a center piece or countertop it can set off an energy of a season or spark a memory of a great achievement. It can be as simple as placing fresh flowers in the center of the table or a single flower bloom on a countertop in the bathroom. Lighting candles can give the room a warm glow and fill the air with fresh scents.

              When creating the home environment think of what you want to feel from it. It may be motivating you to the holiday season where you can pull in some holiday décor like a few springs of holly a few tealights and a crystal vase of ornaments.

              It may be celebrating an afternoon gathering where you can pull in some color with doilies, table cloths and fill the counter top with fresh baked goods at different levels. Setting off a warm inviting atmosphere with the fresh smell of baked goods. Even baking cookies fill the room with an inviting aroma that reminds you of home, and once baked you may as well display them on a nice plate or cake dish with a glass dome celebrating the moment.

              It quite often comes down to the little things that are around the home that makes the home feel warm, inviting, and motivational. There are three things that I believe are important in the home environment that everyone should have.

  1. Motivation
  2. Accomplishment
  3. Past

The first one is motivation. I often say to try and incorporate a little token that reminds you of a goal that you are trying to achieve, it may be is a book on the side table you have been wanting to read, or a little symbol of a structure of a place you want to travel to. It can even be a photo to symbolize something you are striving towards. What this does is it sparks a little reminder each time our eyes glance over it. Having little reminders of our goals that we are striving for is a great motivation of that goal and quite often will bring you a little closer to achieving it. If it is a book that you are wanting to read you may glance over it, pick it up and read a few pages. It may be a gardening book that you flip through the pages as you are thinking of the up-and-coming season.

              The second is the most important, it is an accomplishment. Yes, you need to have your accomplishments in your home environment, your celebrations of the success you have achieved throughout your life. It can be a treasure from an adventure you went on, a photo or even just a small token. If you have a fond memory of a special night with your partner it could be lighting a few candles, or even just having a few tealights around. It could be a small jar of sand from a beach you hiked to or a painting on the wall that reminds you of a great memory.  Celebrating our small and large success reminds us that we can achieve goal and motivates you to reach for more. It creates a sense of peace in ourselves.

              And the third is our past. There is a lot of lessons that we have all learned from our past and it is important to have those close to us. I often think of this part of the home environment as the people of our past, the ones that influenced us, assisted in molding us to who we have become today, the people that we hold close to our hearts with everything that we do. Bring in the past can be in the form of a vase that your grandma had in her kitchen when you were growing up, it could be a tea set or a small token of the people. It could be a blanket someone made for you draped over one arm of the couch, or a throw pillow in the corner.  It can be as simple as a photo on the wall, bringing in the memory of the positive influencers of the past allows us to be motivated to be great positive influencer in the present and the future.

              Creating and what is in your home environment will change over time and throughout the years and that is the best part. We are humans that evolve, and our home environment gets to evolve with us. The best part of the home environment is there are no rules. We are not all the same people, and neither is our homes. Embrace your home and your home environment, change the décor, and play with the little things that you have. Most importantly is to have fun with it!

© 2026 Starla Parkin. tru Theme by SPYR
✕
  • Home
  • Blog
    • Simple Living
    • Gardening
    • Preservation and preparing food
  • About