Time Secrets to making Legendary Cinnamon Buns
Like Most people I love a good cinnamon Bun. My Antie Reene, by far makes the best Cinnamon Buns around. Today I am going to share with you a few secretes tips so you to can make legendary cinnamon Buns.
I can not eat dairy and what that means for me is if I want a good cinnamon bun, I will have to make it myself. And like any good thing it takes time to do. Now, time, that is something that is harder to find when you’re in the mix of a fast-paced lifestyle, but I do have to satisfy my sweet tooth too. That is when I started the dance of give and take with time to find this secret to making cinnamon buns.
In the morning we found to have a bit more time, and to make legendary cinnamon buns you must let the dough rise. So, with this receipt you make the dough in the am, let it sit until dinner before you roll it out. I always utilize the time that I am making dinner to squeeze in another thing. And on cinnamon bun making days that would be the other thing. While you are making dinner you are tossing up the kitchen anyhow, so you may as well pair it up with another mess making task. Like rolling out the cinnamon buns!
Follow the below to make your legendary cinnamon buns, measuring 4 ½” Round!
Ingredients: Oven 350˚ for 30 minutes
12 cups flower ¾ cup butter or margarine
5 1/2 cups warm water 2 cups Brown Sugar
2 tbsp Yeast 4 tablespoons Ground Cinnamon
1 tbsp salt Berries or nuts optional
- Put the flower into a large bowl
- Sprinkle the salt on top
- In a separate bowl add the warm water and yeast, let set while the yeast activates (it will poof up)
- Once the yeast has activated add the water to the flower.
Pro Tip: make a nest in the middle of the flower, then add the water mixture with a fork until you can knead it with your hands.
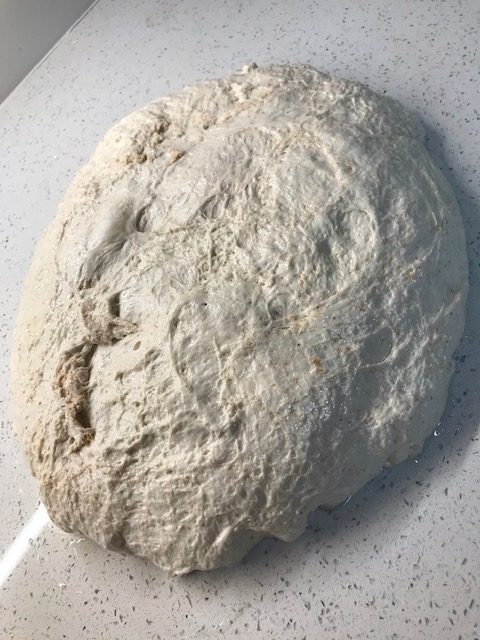
5. Knead the dough well – you can sprinkle a little bit more flower to be able to knead it if it is to sticky, but not to much you don’t want dry hard buns.
Pro Tip: bread likes to be kneaded, the rougher and the more you handle the dough the better it will turn out.
6. Set in the bowl in a semi warm place with a tea towel or wax-wrap over until you get home from work (about 6-8 hours).
Pro Tip: use a little bit of olive oil on the counter, rolling pin and your hands to prevent sticky dough attaching to everything. It keeps the dough from getting to dried out by adding to much flower as well, and makes cleanup easier.
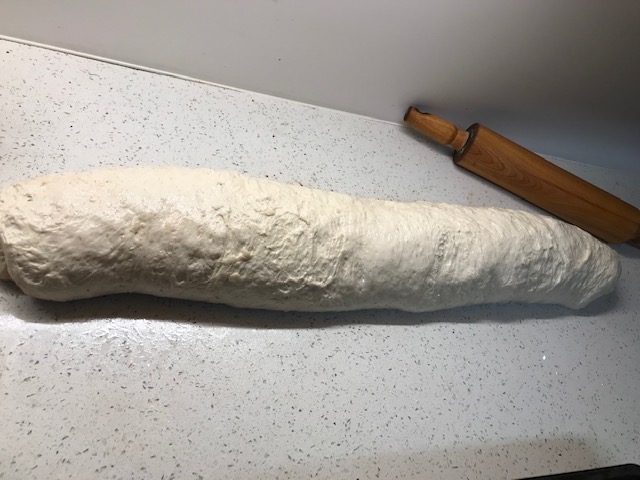
7. Knead the dough down and roll out into a rectangle about 24” x 12”.
8. Spread the butter over the entire surface, about ¾ cup
9. Sprinkle a generous amount of brown sugar, 2 cups.
Pro Tip: The generous amount of Brown sugar will help make the cinnamon buns stickier.
10. Sprinkle a little bit of cinnamon over the top.
11. Optional: add fresh or frozen berries and/or your favorite nuts.
12. Roll the dough lengthwise up into a long roll.
12. Cut the dough in the middle of the roll.
13. Cut the halves into half. Cut each ¼ of the roll into three pieces.
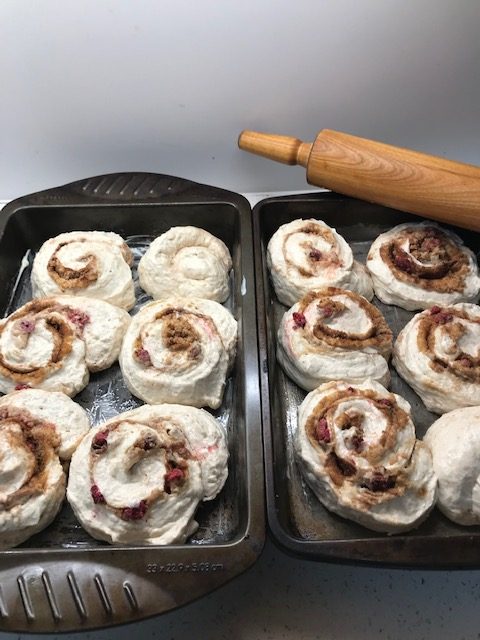
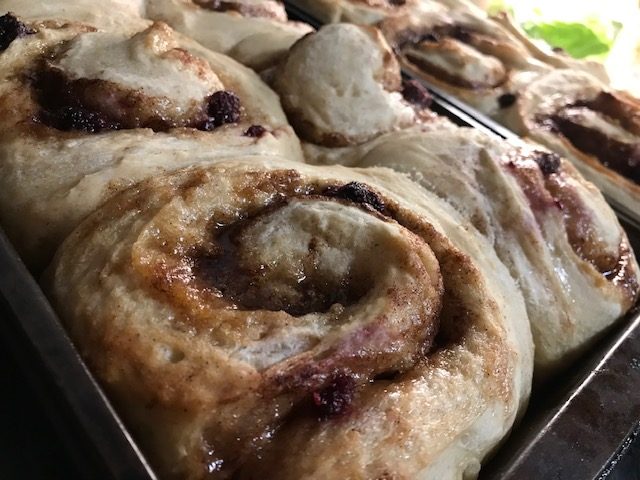
14. Place onto a buttered pan, place a tea towel or waxed cotton overtop, and let rise for 1-2 hours (rising time will depend on how warm your home is, if you place in a warm area they will rise faster). 6 cinnamon buns fit per 9” x 13” Baking pan, as in above photo.
15. Bake at 350 degrees for 30 minutes.
16. Pull out and let set for 10-15 minutes before spreading the icing on top.
Butter Icing:
1/2 cup Butter or margarine
3 cups Powdered icing sugar
1 teaspoon Vanilla
1 ½ tablespoons Milk or soy milk
- Cream the butter until smooth
- Add the icing sugar 1 cup at a time with ½ tablespoon of milk, alternating until all is used.
- Add the Vanilla to flavor
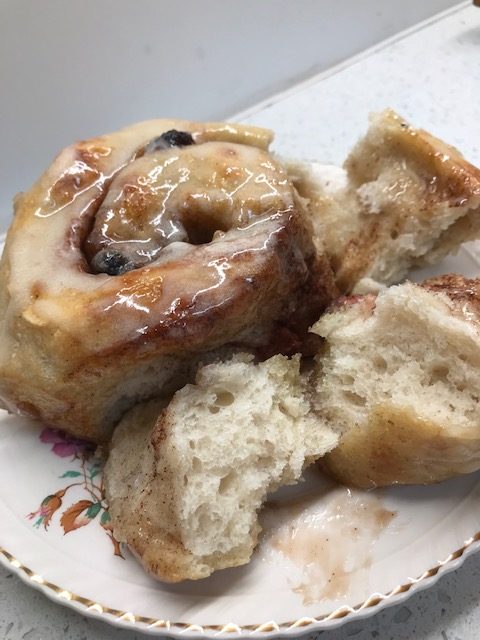
- Drizzle onto the top of the cinnamon buns while they are warm but not to hot.

Preserving:
The Cinnamon buns will store great in an airtight container for a few days if they don’t get eaten first!
Or you can individually wrap and store in the freezer. They are great to through in your lunch or warm up for a delicious meal or snack, and will last in the freezer up to 3 months.